Se den skapade rundturen i izi.TRAVEL för iOS (iPhone)
To view the created tour, open the audio guide (izi.TRAVEL) on your smartphone.

If the audio guide has not yet been installed, download and install the latest version of izi.TRAVEL.

By default, access to the tour you have created will be protected by a passcode. Therefore, the first step is to enter this passcode into izi.TRAVEL.
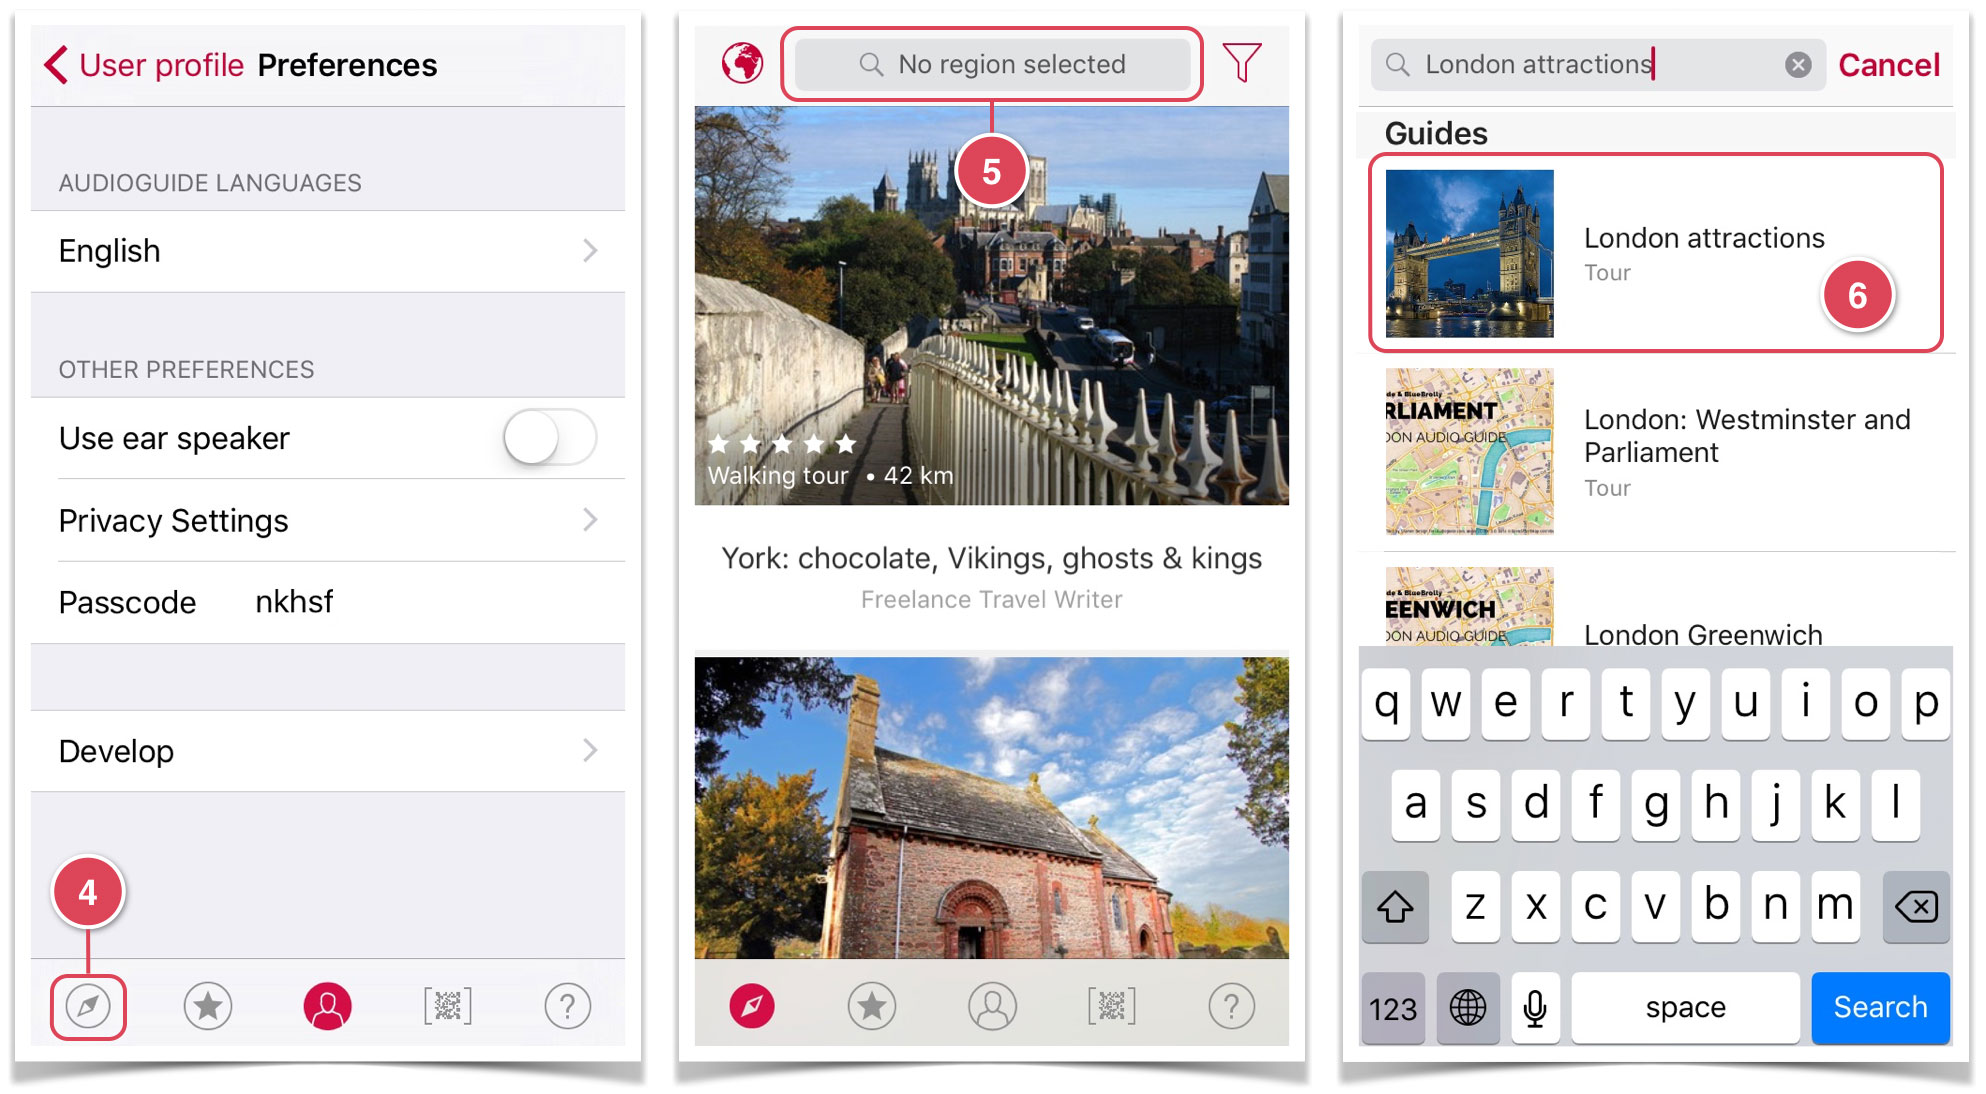
Enter the passcode
Go to the “Profile” section 1 and select “Preferences” 2. Enter passcode 3 by using the virtual keyboard, and press “Enter”.

Now the tour you have created will be available in the izi.TRAVEL app.
Test the tour elements
Go back to the Explore section. 4. Find your tour by scrolling list or enter the tour name into the “Search audio guides” field 5. Select the tour from the list of search results 6.
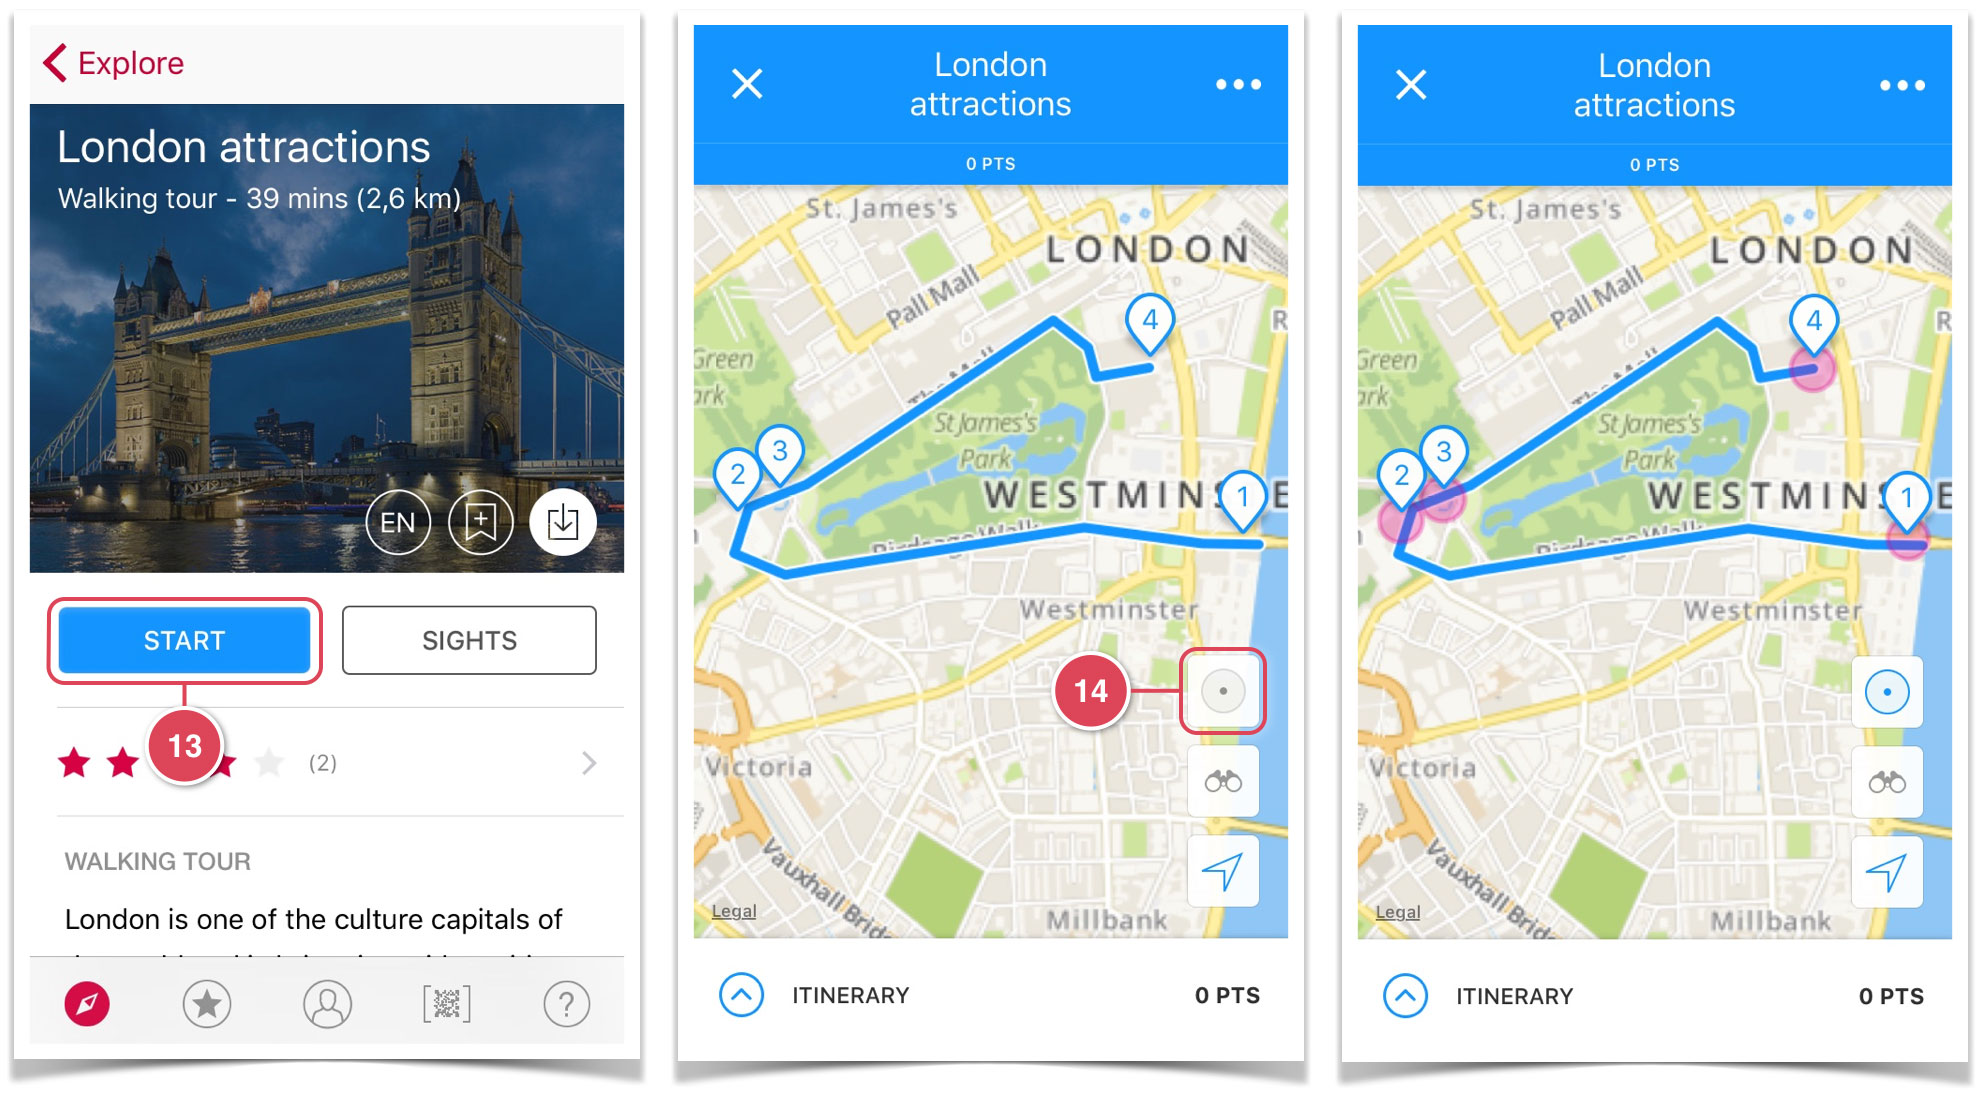
The tour window will open. An example is shown in the image below. The tour window also contains the tour image, name and description. Using the “download” button 7 you can download this tour onto your mobile device, so that you do not need to rely on a mobile internet connection while en route. Click the “download” button 7 and save the whole tour to your phone. When the download is complete, the “Download” icon will change color.
Press “Sights” 8. This opens the window containing the tour’s first tourist attraction. Press the player button 9 and listen to the story you uploaded.

To view the tourist attraction’s description, press 10 and select “Read description” 11.

Close the description and press 12. This opens a list containing all of the tour’s tourist attractions. Check if everything matches your tour.

Go back to the tour’s main window, and press “Start” 13.
This opens the tour map. The tour map will show the created tourist attractions’ icons and the tour route. To see the tourist attractions’ trigger zones, press 14.
Important: If you have made changes to your tour, but they are not visible in OPAS, it is necessary to delete the old data. To do this, go to “Profile”, select “Settings”, open the “Development” section, and press “Delete all packets and temp files”.
Testing a tour
The next step is to test the tour. Use the audio guide to go over the route for the created tour so that you can test it in real-life conditions.
Before commencing this step, check that you have downloaded the navigational and tourist attraction audio stories. You will be unable to test the audio guide until you have done so.
Check the functioning of the tourist attractions’ trigger zones.
Enlarge the tour map scale so you can easily follow your progress, and go to the first tourist attraction 1. As soon as you cross the boundary of a tourist attraction’s trigger zone 2, the audio story about it will start playing automatically (if you have uploaded the story). At the same time, the tourist attraction icon’s color will change to red, and instead of a number, it will show three equalizer columns 3, and a headphones icon will appear on the navigation panel. 4. When you finish listening to the audio story, a check mark will appear on the tourist attraction’s icon 5, and the headphones icon will disappear from the navigation panel.

Go over the entire tour route in the same way. Make a note of any deviations from the expected run of events – stories start playing too early or too late. Enter the relevant corrections in the tour (change the trigger zones’ size or location) and go through the tour again.
If the tour corresponds to this description, then you have done everything correctly. Now, you can proceed to creating a real tour.