Museum collections
A Museum audio guide can contain Collections of Exhibits. These may be Collections of Exhibits by specific artists, Exhibits from a particular historical period, and so on. The same Exhibit may be placed in many Collections.
You can use Navigational tips to help the visitor to navigate between Exhibits.
To create a Museum Collection in the izi.TRAVEL CMS, do the following:
- Create a Collection object
- Add Items to a Collection
- Arrange Collection items.
- Remove an object from the Collection.
Create a Collection object
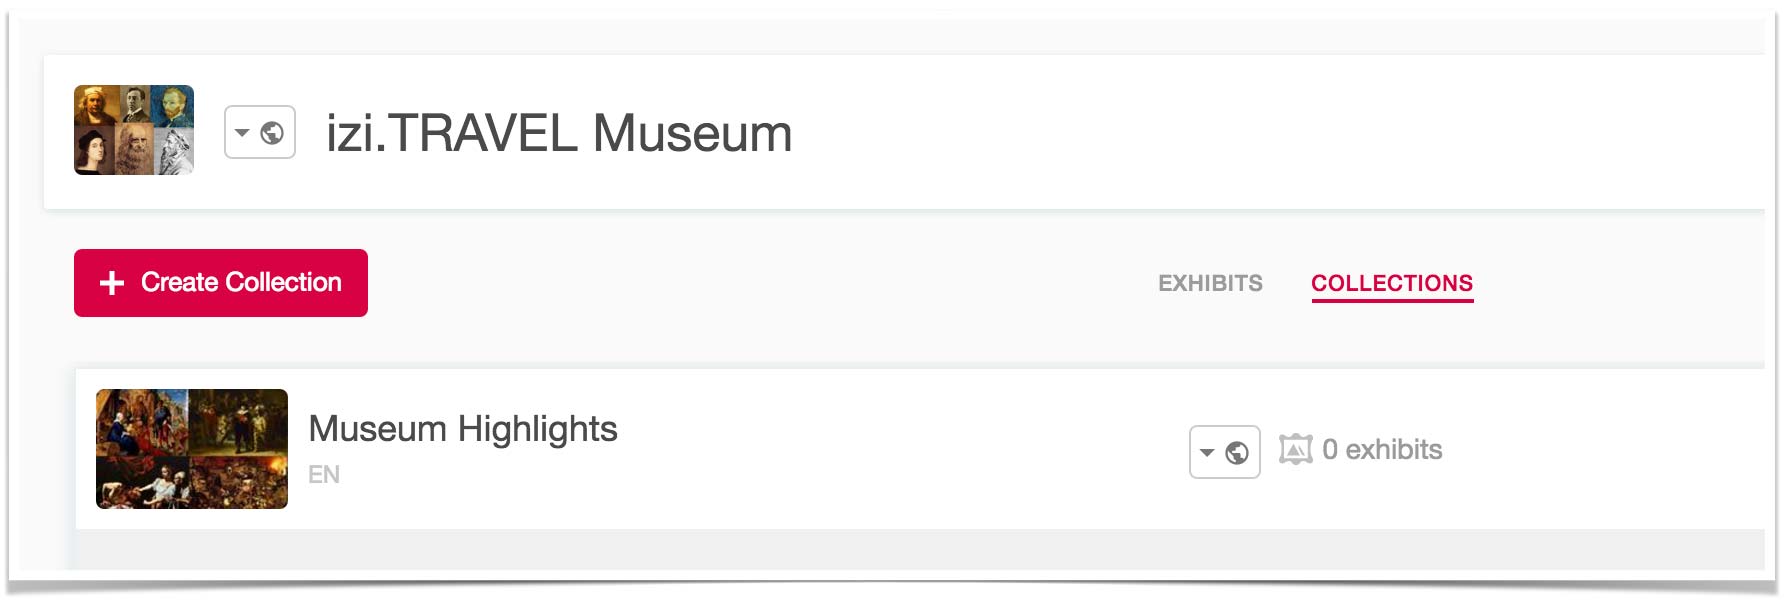
- Open the “Collections” section. The Collection list is displayed.

- Click “Create Collection”. The Create Collection window is displayed.

- Enter the name of the Collection and click “Create”. If necessary, change the Main language using the drop-down.

The Collection Properties screen is displayed.
- In the Collection Properties screen, do the following:
- Enter the Collection Description.
- In the “Audio” section, click “Choose File” and select an audio file for the Collection.
Note The Audio file must be in one of the following formats: .mp3, .ogg, .aac, .wav, .amr, .3ga, .m4a, .wma, .mp4, .mp2. - Click “Save”.

- In the “Images” section, click “Upload image” and select an image file for the Collection. You can upload up to 16 images for each Collection.
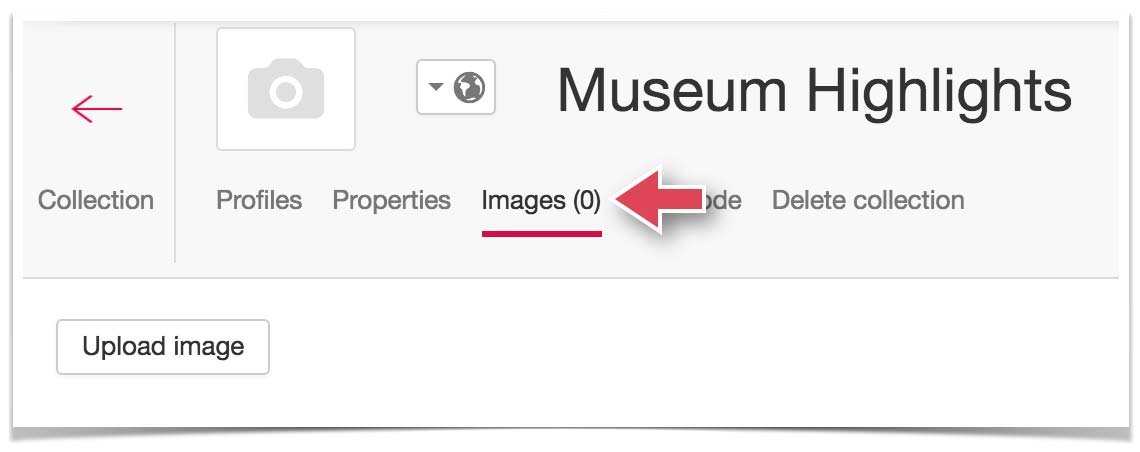
A thumbnail of the uploaded image is displayed. You can crop the uploaded image, add more images or place images in a particular order. For more information, see Preparation of images or the Image processing video tutorial.
- Click the “Caption” field beneath each image and enter a short piece of text to be used as a caption. Captions may be a short comment or information about the legal owner of the image. In the izi.TRAVEL mobile app, captions are visible when viewing images in full screen mode.
- Click the Back button to return to the Collection main screen.

The Collections list now contains the new Collection.
The Collection itself is empty. The next step is to fill the Collection with Exhibits and Navigational tips.
Add Items to a Collection
A Collection can contain Exhibits and Navigational tips.
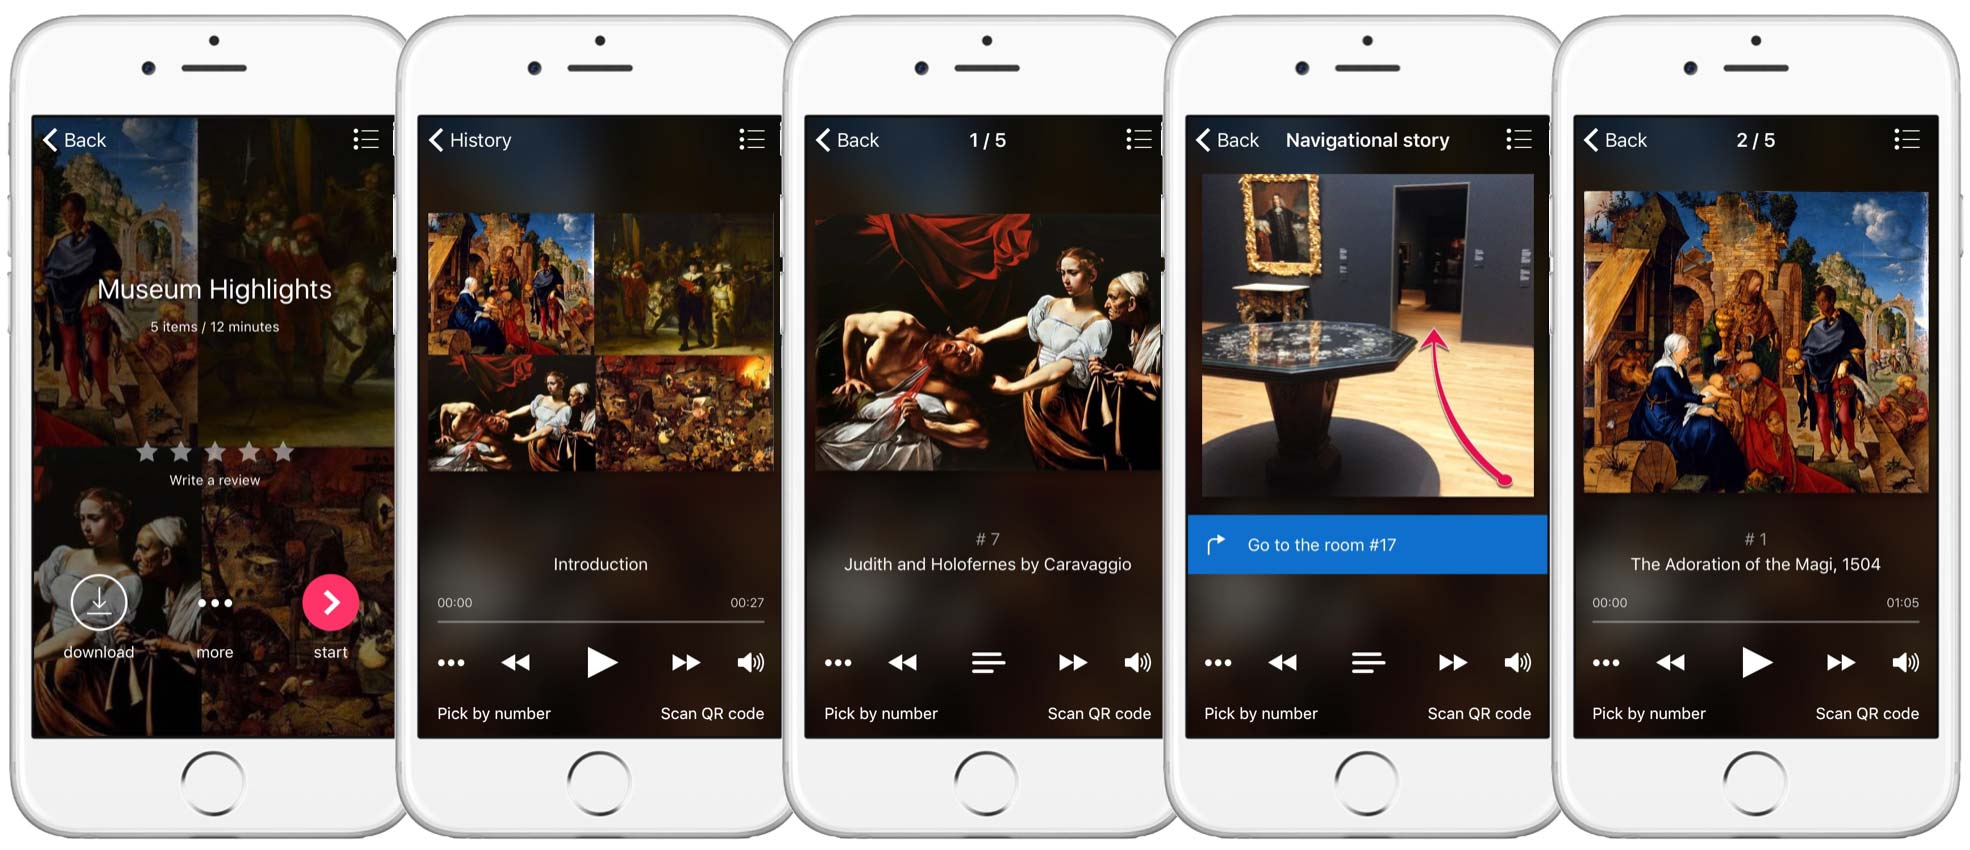
A Navigational tip tells the visitor how to navigate between Exhibits. It is displayed in the same way as an Exhibit, with an image, short description and audio instructions. For example, this can be a picture of the room with an arrow pointing in the direction of the next room or the next Exhibit in the Collection.
You can add Items to the Collection in the following ways:
- Add Exhibits to the Collection from the “Exhibits” section
- Add Exhibits from the Collection main screen
- Create a new Item in the Collections main screen
Let’s consider each of these ways.
Add Exhibits to the Collection from the “Exhibits” section
- Open the “Exhibits” section.
- Select the Exhibits to add to the Collection using the checkbox in the upper-left corner of each Exhibit.
When you select an Exhibit, the Selections toolbar is displayed at the bottom of the screen.

- Click on the Collections button and select the new Collection.

The selected Exhibits are added to the Collection. The Collection main window is displayed.

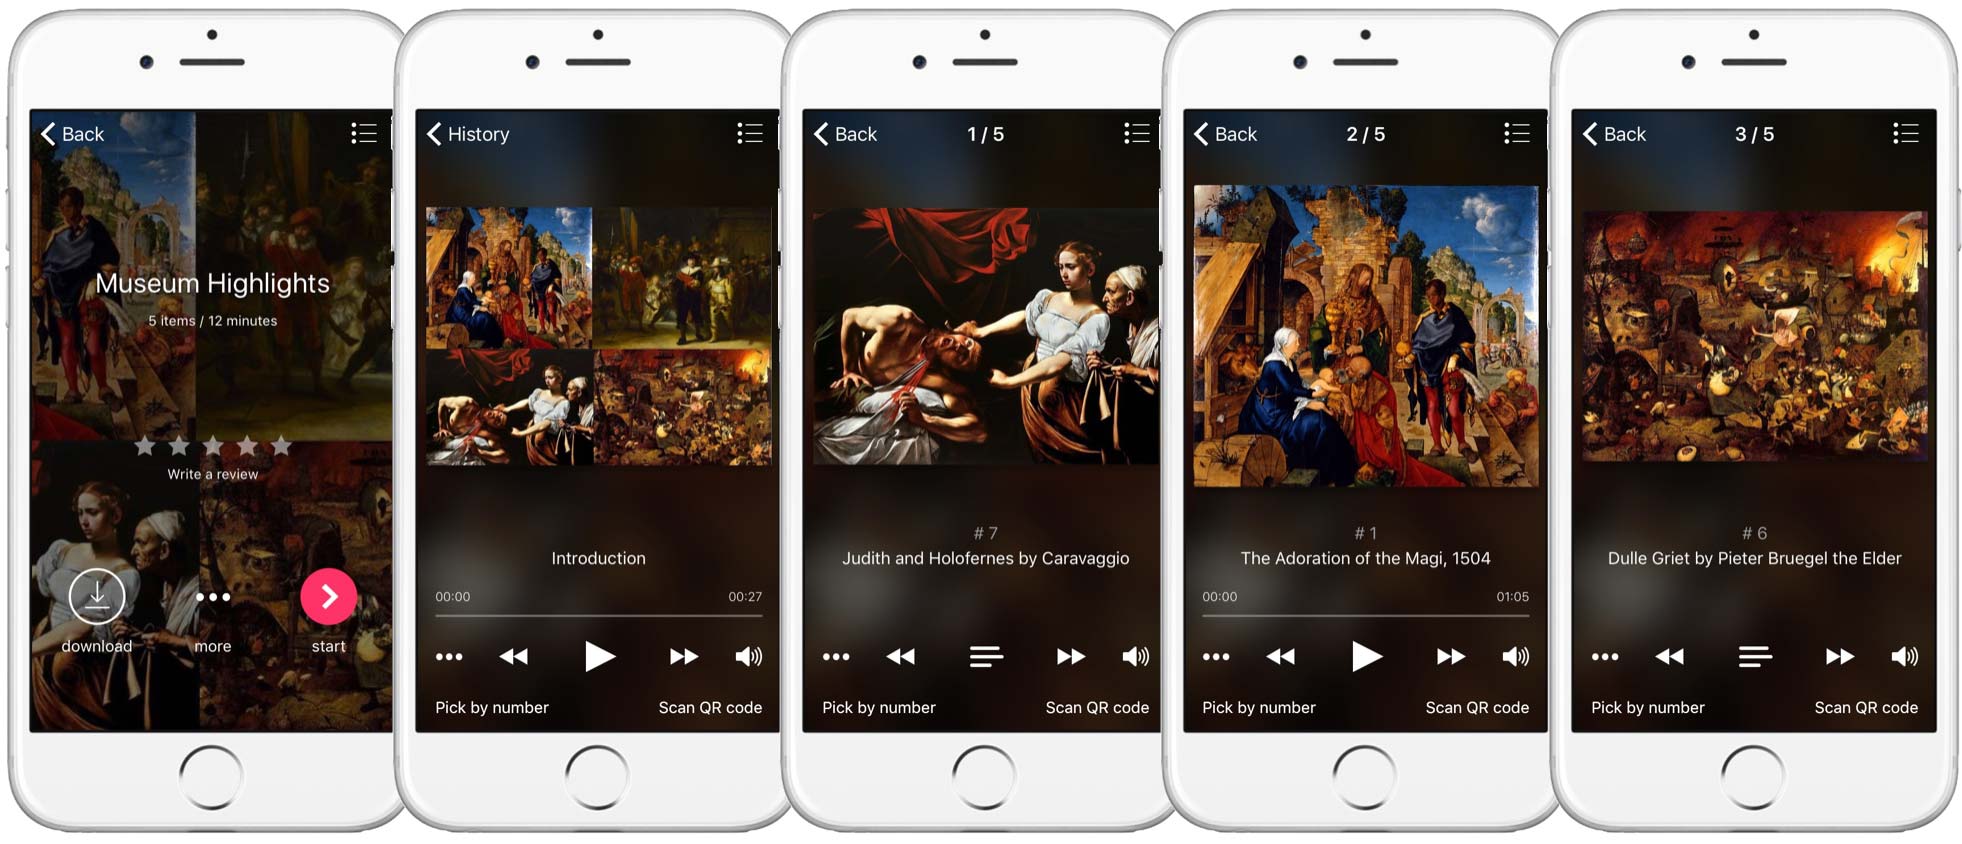
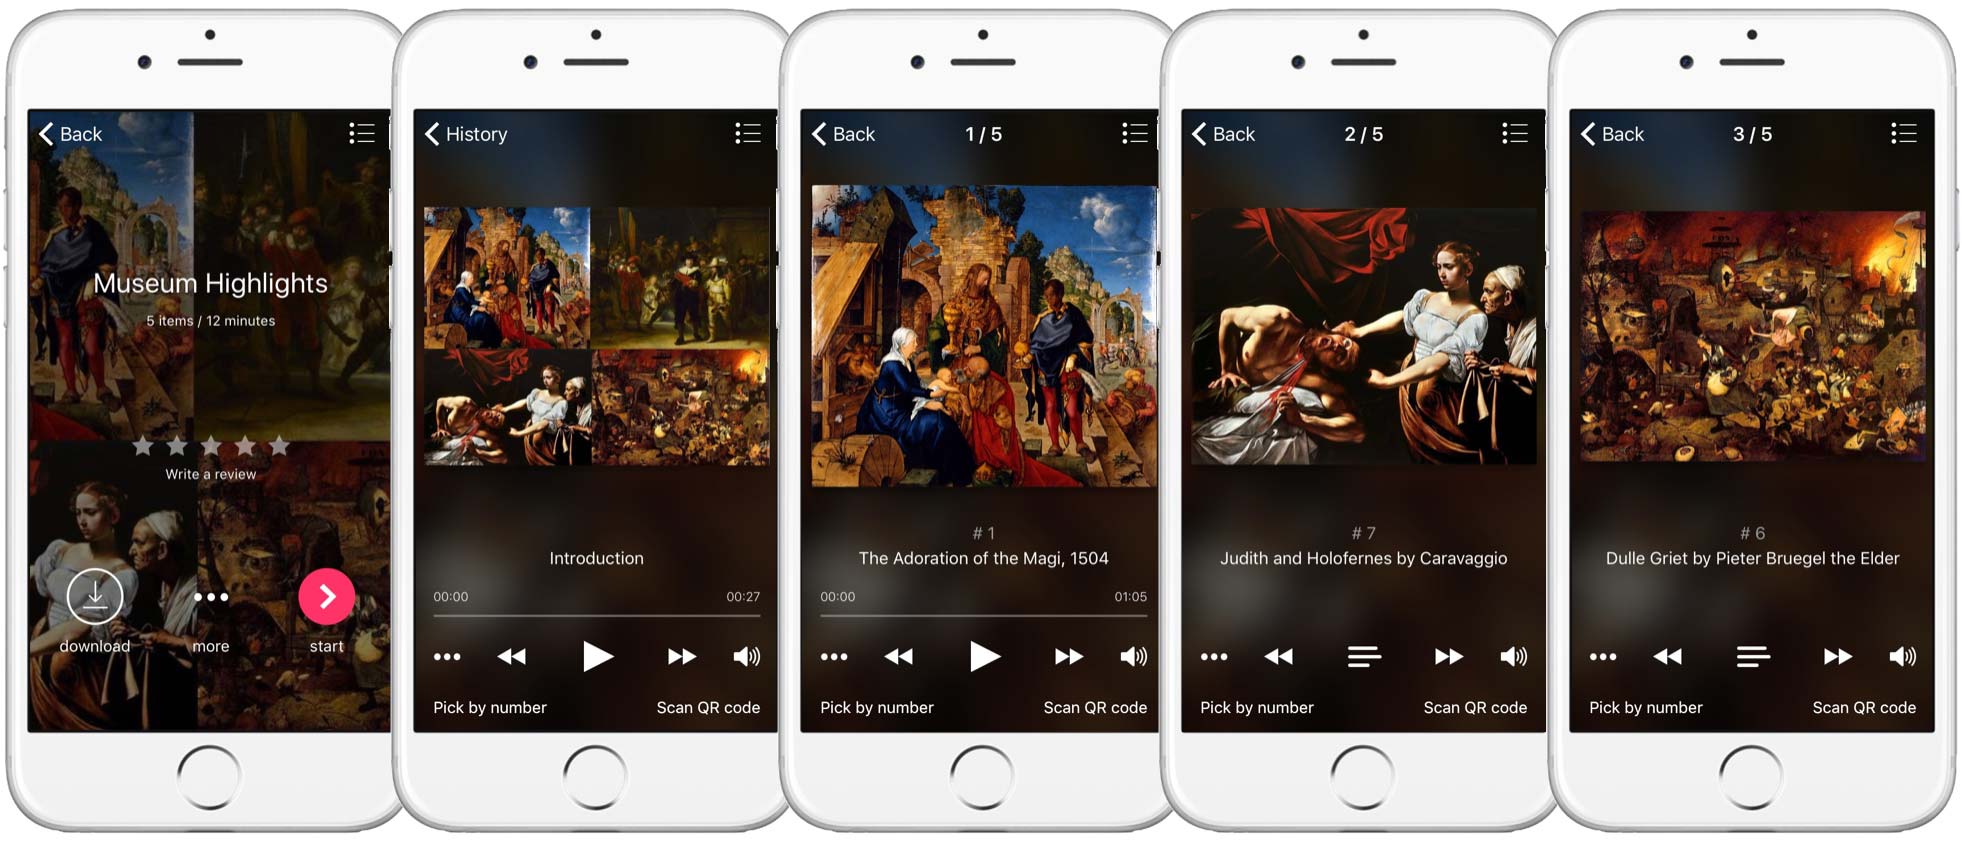
The Collection is displayed in the izi.TRAVEL mobile app as follows:
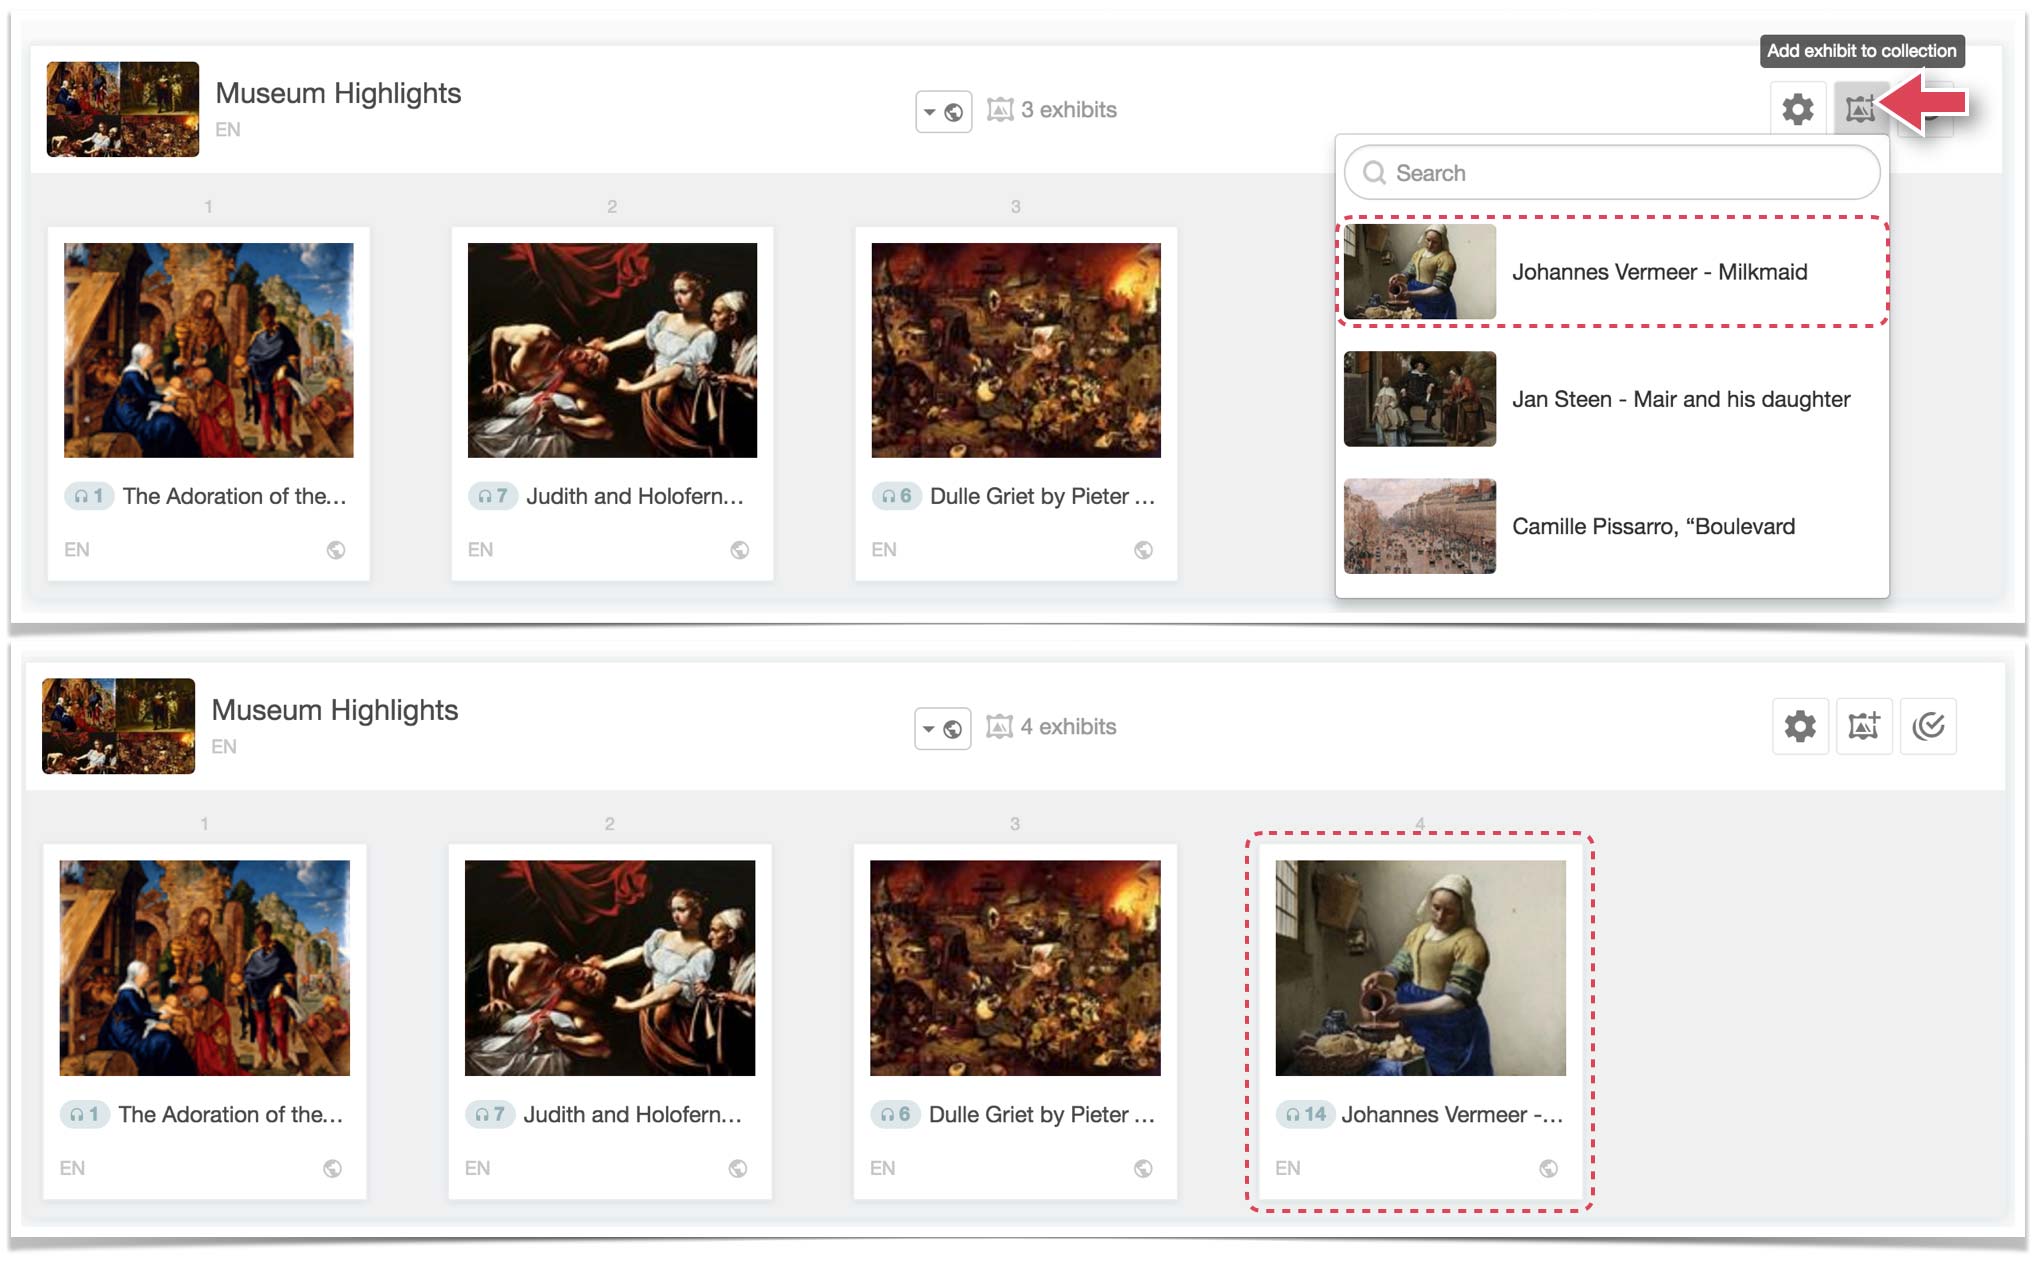
Add Exhibits from the Collection main screen
- Open the Collection main screen.
- Click “Add exhibit to collection”. The Exhibits list is displayed.
- Click the Exhibit to be added. The Exhibit is added to the collection in the last position. If necessary, you can move it to another position.
Create a new Item in the Collection main screen
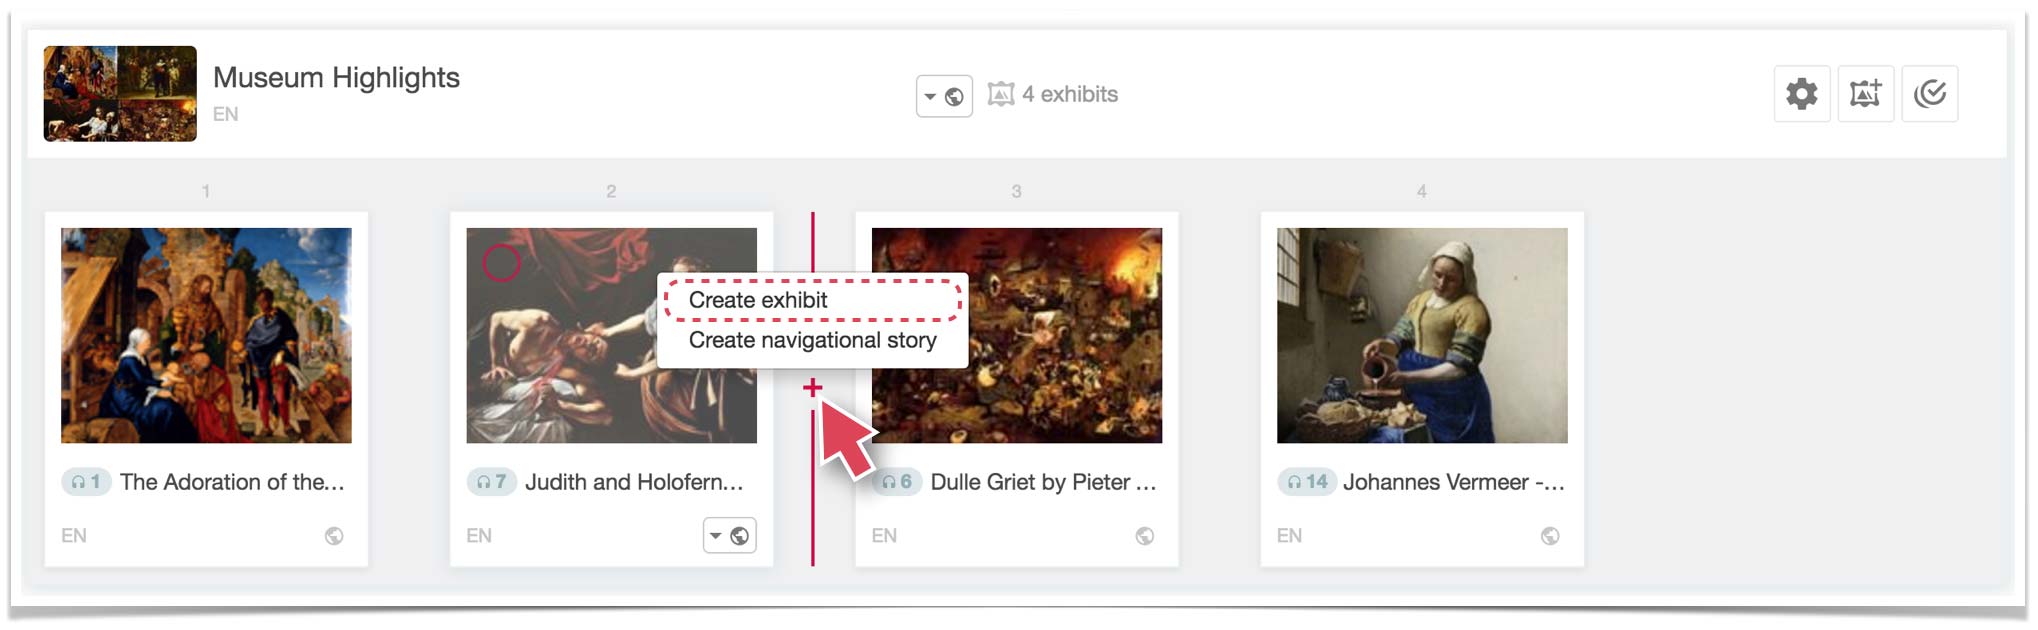
- In the Collection main screen, click “Create exhibit” or “Create navigational story”.
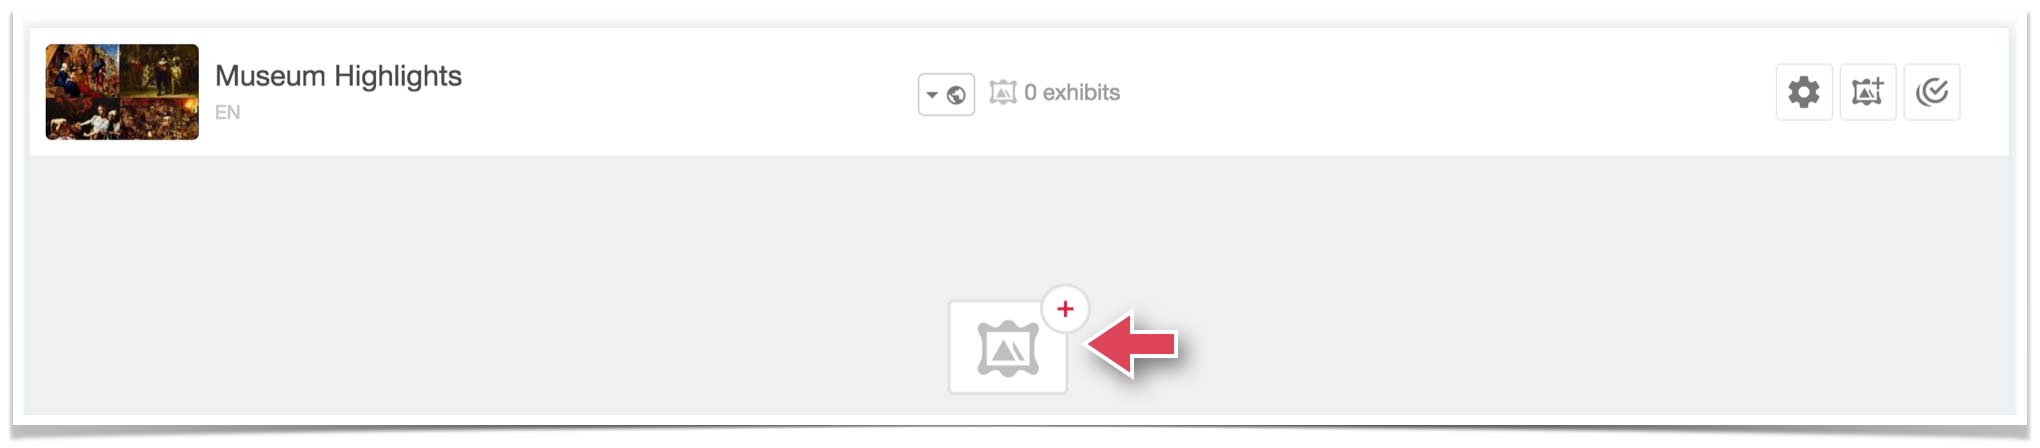
- If the Collection is empty, the “Create exhibit” button is in the middle of the screen.
You cannot add Navigational tips to an empty Collection.
- If the Collection is empty, the “Create exhibit” button is in the middle of the screen.
-
- If the Collection already contains Exhibits, move the cursor to the position where the new Item should be added. A vertical divider appears with a + sign in the middle. Click + and select “Create exhibit” or “Create navigational story”.
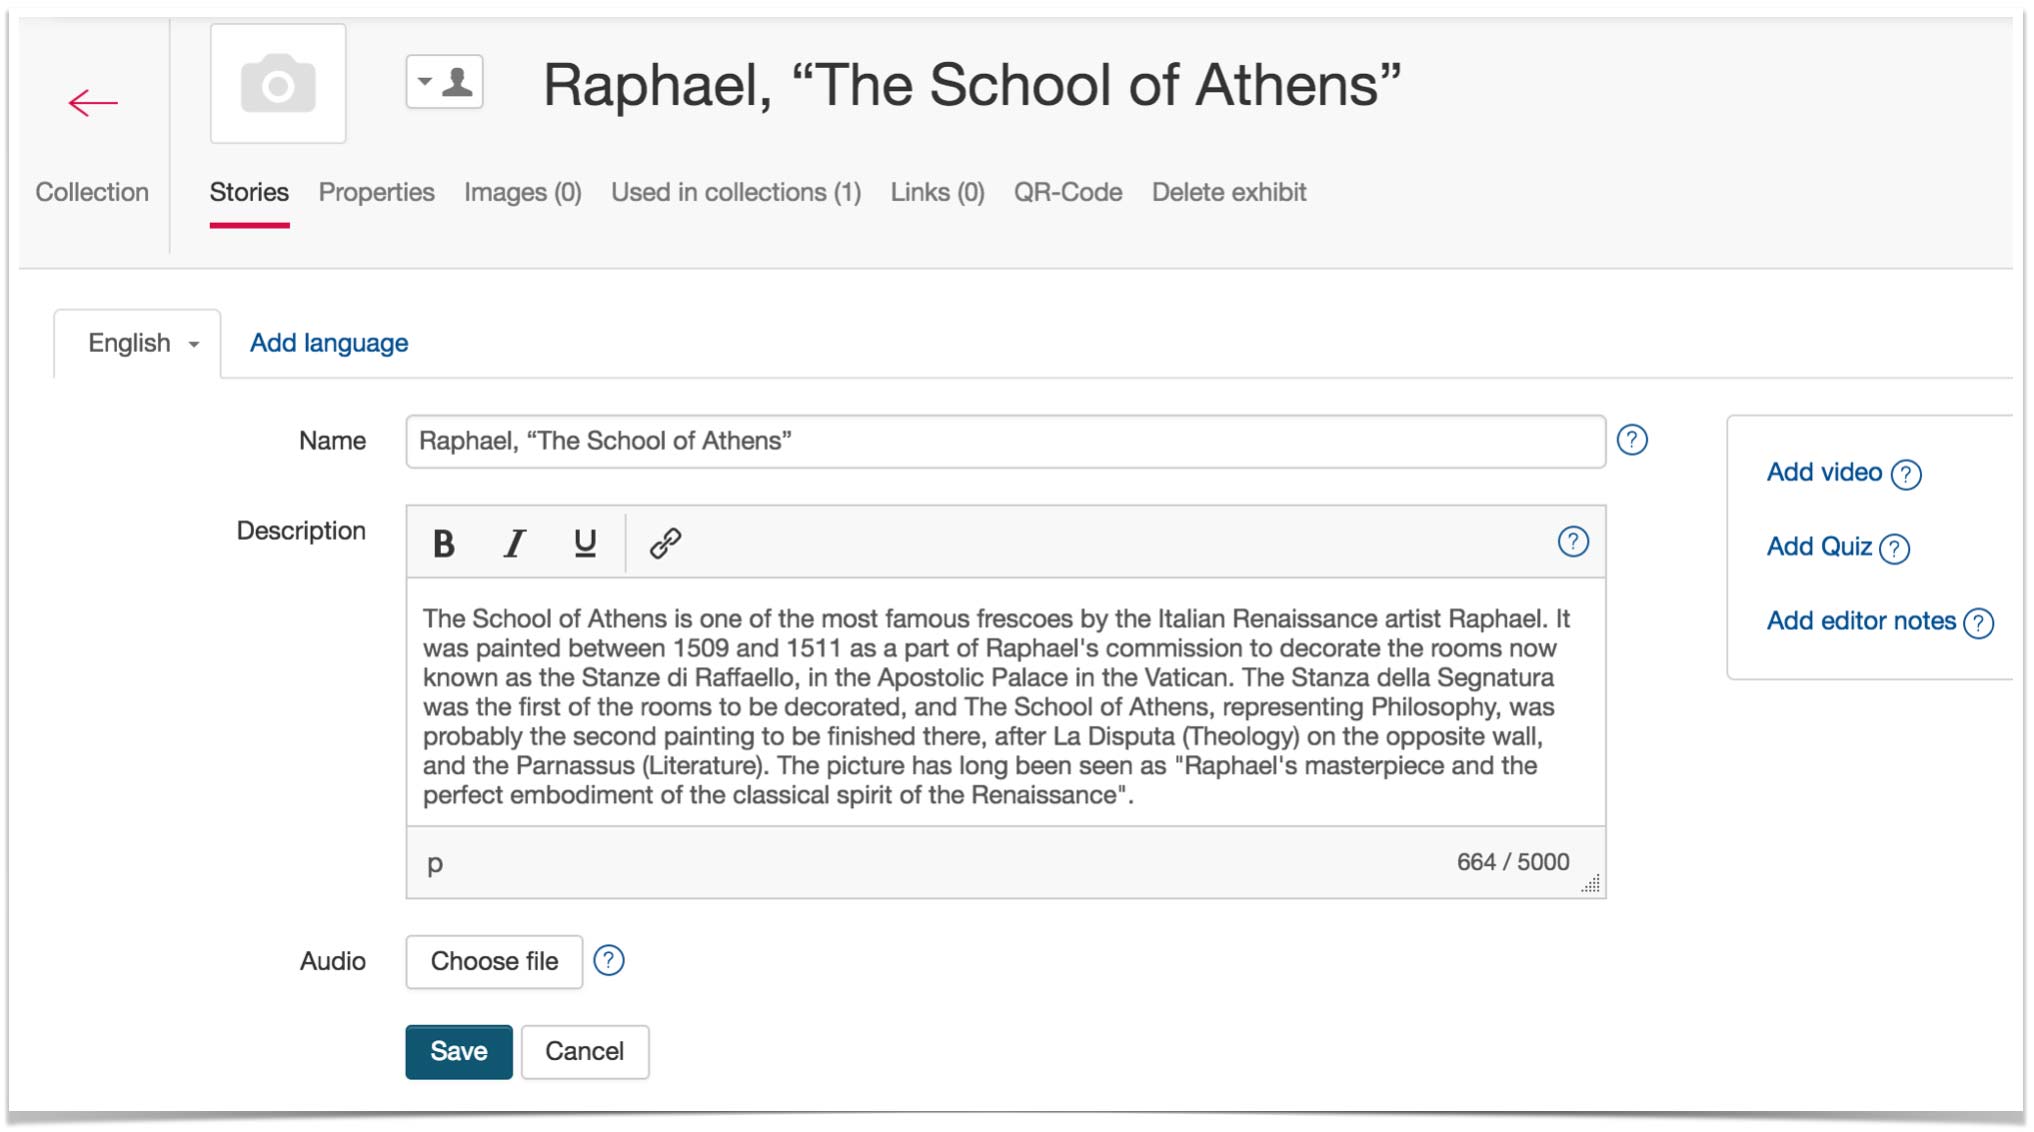
A window to create the new Item is displayed.

- Enter the name of the Item.
- For Exhibits, add the catalogue number.
- If necessary, change the Main language using the drop-down.
- Click “Create”. The Properties screen for the new Item is displayed.
- Enter a Description for the Item. For Exhibits, this is a description of the piece of art. For Navigational tips, this is a description of where to go next.
- In the “Audio” section, click “Choose File” and select a file to use as an audio story for the Item. Note The Audio file must be in one of the following formats: .mp3, .ogg, .aac, .wav, .amr, .3ga, .m4a, .wma, .mp4, .mp2.
- Click “Save”.
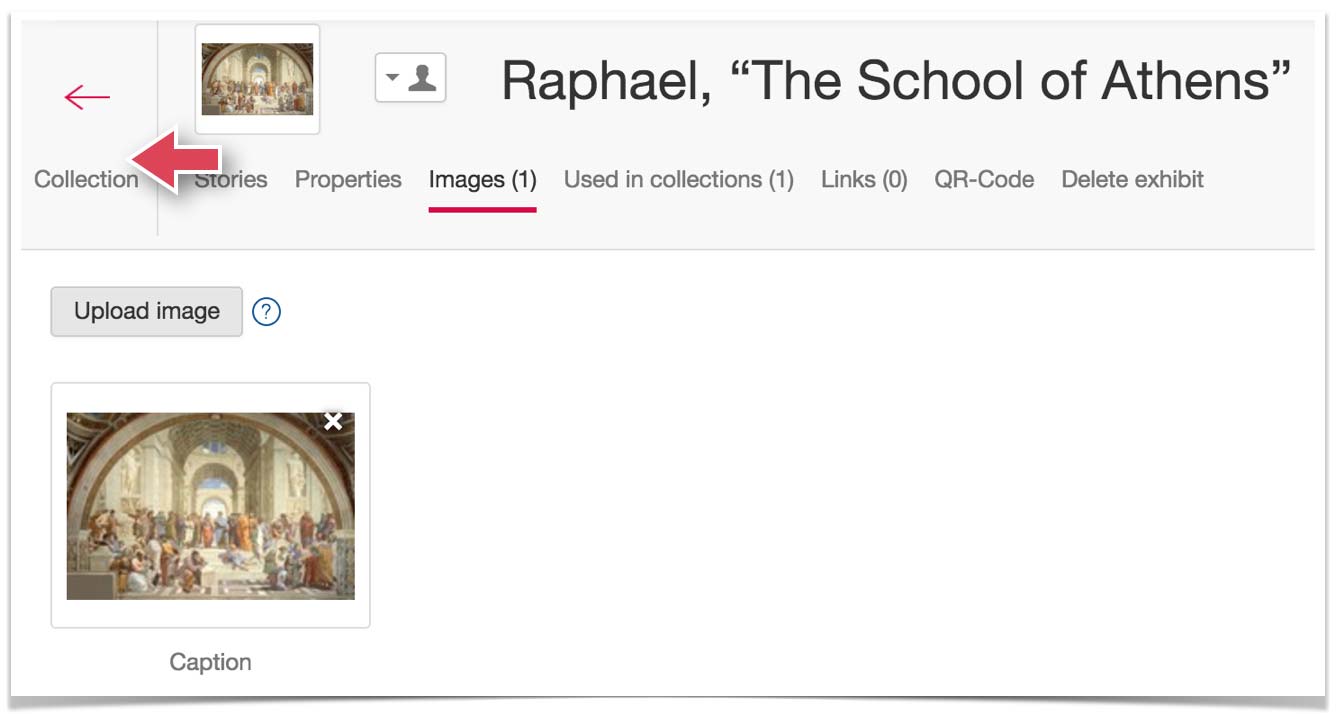
- In the “Images” section, click “Upload image” and select an image for the Item. You can upload up to 16 images for each Item.

A thumbnail of the uploaded image is displayed. You can crop the uploaded image, add more images or place images in a particular order.
- Click Back to go back to the Collection main screen.
The new Item is added to the Collection in the specified position. Exhibits are also made available in the “Exhibits” section.

Navigational tips are displayed in the izi.TRAVEL mobile app as follows:
Arrange Collection items
Drag and drop Items in a Collection to change their order.

Remove an Item from the Collection
- Select the Items to remove from the Collection using the checkbox in the upper-left corner of each Item. When you select an Item, the Selections toolbar is displayed at the bottom of the screen.
- Click “Remove from collection”.


Photo Navigation
As opposed to just wandering around a museum, a museum tour is all about sequential and consistent visit. The items...
Learn more
How to prepare images for photo navigation
Here we want to show you the easiest and the most convenient way to create photo navigational images, e.g. prepare...
Learn more