Check whether the audio guide is ready to be published
Before you publish the audio guide, we recommend verifying that all of its components (main page, exhibit items, tourist attractions, etc.) have a description, audio story, and illustrations. This is done in the audio guide check mode.
This mode can be enabled from the main pages of museums, collections or tours by pressing “Check” 1.

The image below shows the museum window in Check mode:
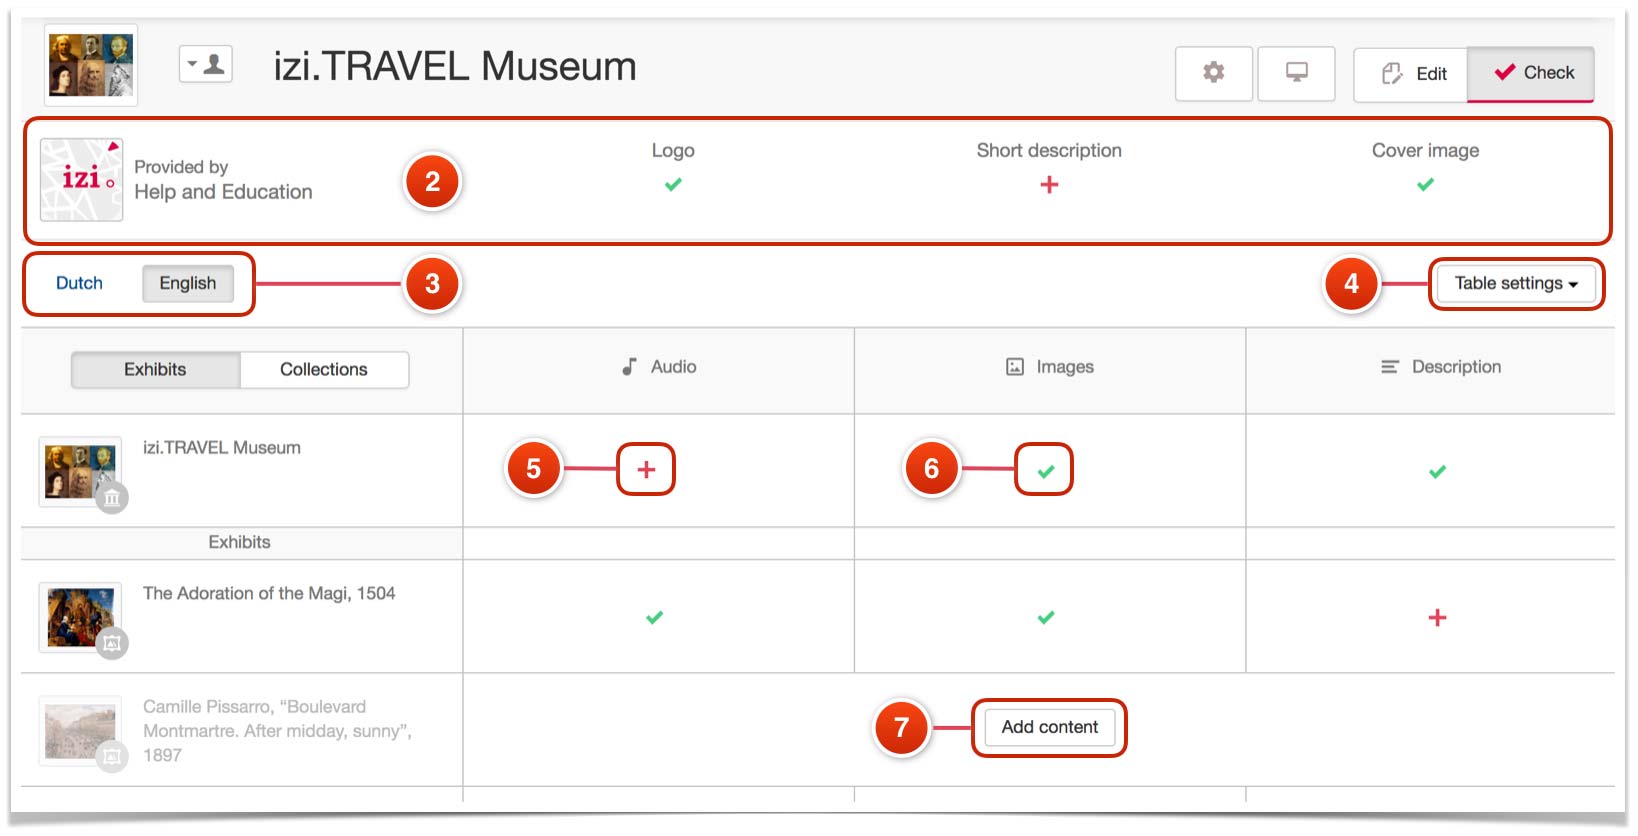
Window elements composition:
- “Branding” section block 2.
- Language switcher 3.
- Setting up the parameters to be checked (table columns) 4.
- Symbols indicating the absence 5 and presence 6 of a certain content type. Clicking on such a symbol opens the item properties window where you can add the missing parameter (audio, description, image, etc.)
- Button 7, appearing next to the item which has no content in the selected language.
- Exhibit Items/Collections switcher 8.
- Table columns’ headers 9. They show the names of the checked parameters and also perform the function of filters.

“Branding” Section block
The “Branding” Section block” consists of a miniature logo image, company name, and the results of checking the three main parameters: logo, brief description, and background image.

All of these elements are interactive so pressing any one of them opens the content provider properties in the “Branding” section. If a certain parameter is missing, this is the place for adding it. In addition, in this section you can provide a complete description of the company and its contact information online. More about the “Branding” set up.
Language switcher
In the case when museum or tour have content in several languages, the switcher allows you to select a specific language in which to perform the check.
Setting up the parameters to be checked
By default, three parameters are checked: audio story, image, and description. Using the “Set up table” button, you can broaden the checked parameters’ content.

Below, you can see an example of a table with the maximum number of checked parameters. Some of them may pertain only to a museum or a tour, but not to an exhibit item or a tourist attraction. In those cases, a “-” symbol is placed 10.
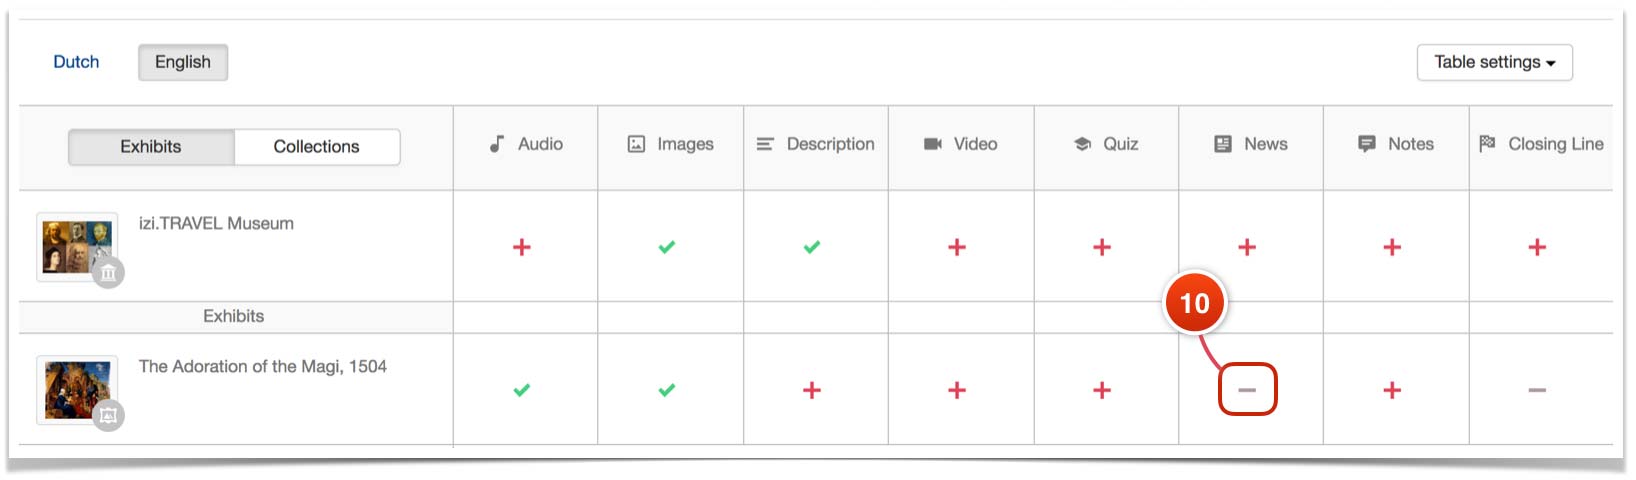
Exhibit Items/Collections switcher
This switcher exists only in the museum audio guides. In the ” Exhibit Items” mode, all museum exhibit items are checked. In the “Collections” mode you can check the exhibit items of a specific collection.
On the image below, the switcher is set to the “Collections” position. The first row of the table is devoted to the museum properties; the two following rows are devoted to the two collections included in the museum. Each row displays the properties status of these collections.

To assess the readiness of the exhibit items included in the collection, you need to click on its name. In this case, the first table row will be occupied by the collection, and its exhibit items will be placed below.

Filtering the table data
The table headers perform two functions: they specify the checked content’s type and act as a filter. Pressing the header opens the filter “Only without (parameter name)”. You can see an example of such filtering for the Audio parameter.

By selecting this filter, you will get a list of the exhibit items which do not have an audio history. The header acting presently as a filter will be highlighted in red.

Filtering is done by a single parameter only. For example, if the “Audio” filter is active, and you choose a “Description” filter, the display will include only items with an empty “Description” field. Whether or not these items have audio will not be taken into consideration.

To cancel filtering, you need to press on the active filter’s header and select “Show all”.
Procedure for checking a museum before publishing
We will take the example of checking a museum audio guide prior to publishing it for the first time. We will work based on the minimum audio guide requirements:
- The introductory story must contain a description and a photo.
- All exhibit items must contain audio stories, descriptions, and at least one illustration.
- The museum needs to be recognizable, therefore, the “Branding” section parameters need to be set up.
We will perform the following actions:
- In the main museum window, we will press “Check”.
- We check the completion level of the “Branding” section. If there is something missing, we will press on the relevant symbol (a plus sign). In the newly opened window, we fill in the missing information.
- We find out how many exhibit items we have without audio histories. To do that, we press the Audio header and select “Show all items without audio”.
- If there are such items, we add an audio history to each of them. To do this, we click on the red plus sign, and download the audio history file in the newly opened window.
Useful information. By pressing the “+” or “v” symbols, you open the window with the item properties in the new browser tab. To return to the checking table, simply close the tab. Do not forget to update the information because the table reflects the data as it is at the moment you switch to the window for editing the item properties.
- Once all exhibit items are supplied with audio stories, we check if illustrations are present. To do that, we press the “Images” header and select “Show all items without images”.
- We upload images for each item in the same way we uploaded the audio stories – by clicking on the red plus sign and uploading the image file in the new window.
- The last step will be to check if the “Description” field is complete. We press the “Description” header and select “Show all items without a description”.
- If there are such items, we open their properties and fill in the field.