City Tour Navigation
Often, when creating a city tour, content providers limit themselves to creating sites and the route line. As the user makes his way through a tour, he has to periodically check the route using the tour map on his mobile device. This can be rather awkward. To makes your tours as easy to use as possible, we recommend that you create voice prompts – suffix and navigational stories.
Here, we tell you what these elements are and how you can use them to enhance your tours.
Suffix stories
A suffix story is a supplement to the story about a site. It starts immediately after the main audio story has played. We recommend using suffix stories as a “bridge” between tour attractions. The text of suffix stories should tell the user about the next attraction on the tour, and how to get there.
For example: “We have just heard the story of the creation of the Alexander Column and the next point on our tour will be the Winter Palace. From there we’ll begin the story of the Winter Palace.”
Creating a suffix story
On your map, select the icon of the tourist attraction requiring the suffix story. Click the compass icon in the information box that opens:

The properties window of the suffix story opens. Load the audio story that you’ve prepared in advance.
An explanatory audio text is sufficient for a suffix story. There is no need for a complete description with images, since the user of the mobile app won’t see them. He will simply hear the audio that you’ve uploaded.
The suffix story that you create will be in the same block with the associated tourist attraction in the list of tour objects.

Navigational stories
A navigational story is yet another way to help the user navigate the tour.
Unlike suffix stories, the navigational story is not tied to any tourist attractions. Instead, it’s tied to a specific area on the map. This area is called the “trigger zone” and is created along with a navigation prompt. As soon as the user enters this zone, the navigational story automatically starts playing. In the image below, the trigger zone is indicated by a translucent red circle.

When are navigational stories used? As a rule, they are used when the user should be alerted to an upcoming turn, or an intersection he must navigate, and so on. For example, to alert the user to an upcoming turn, create a navigational story with a trigger zone that begins 30 meters from the corner. Sample text for an audio story: “In 30 meters, turn right and proceed ahead about 100 meters.”
Creating a navigational story
To create a navigational story, select the tool (1), and then click the spot on the map where the tour route changes direction and the user must be alerted (2).

In the window that opens, fill in the name of the navigational story and click the “Save” button.

There will now be a new object – the navigational story – on the map and in the list of tour objects . By default, it creates a circular trigger zone with a radius of 50 meters. If you would like to change the size or position of the trigger zones, then you can adjust them. Use the central node (3) for repositioning, and use the nodes on the circle (4) to change the radius. Save your changes by clicking the “Save” button.

The last step is to upload the audio story with the prompts.
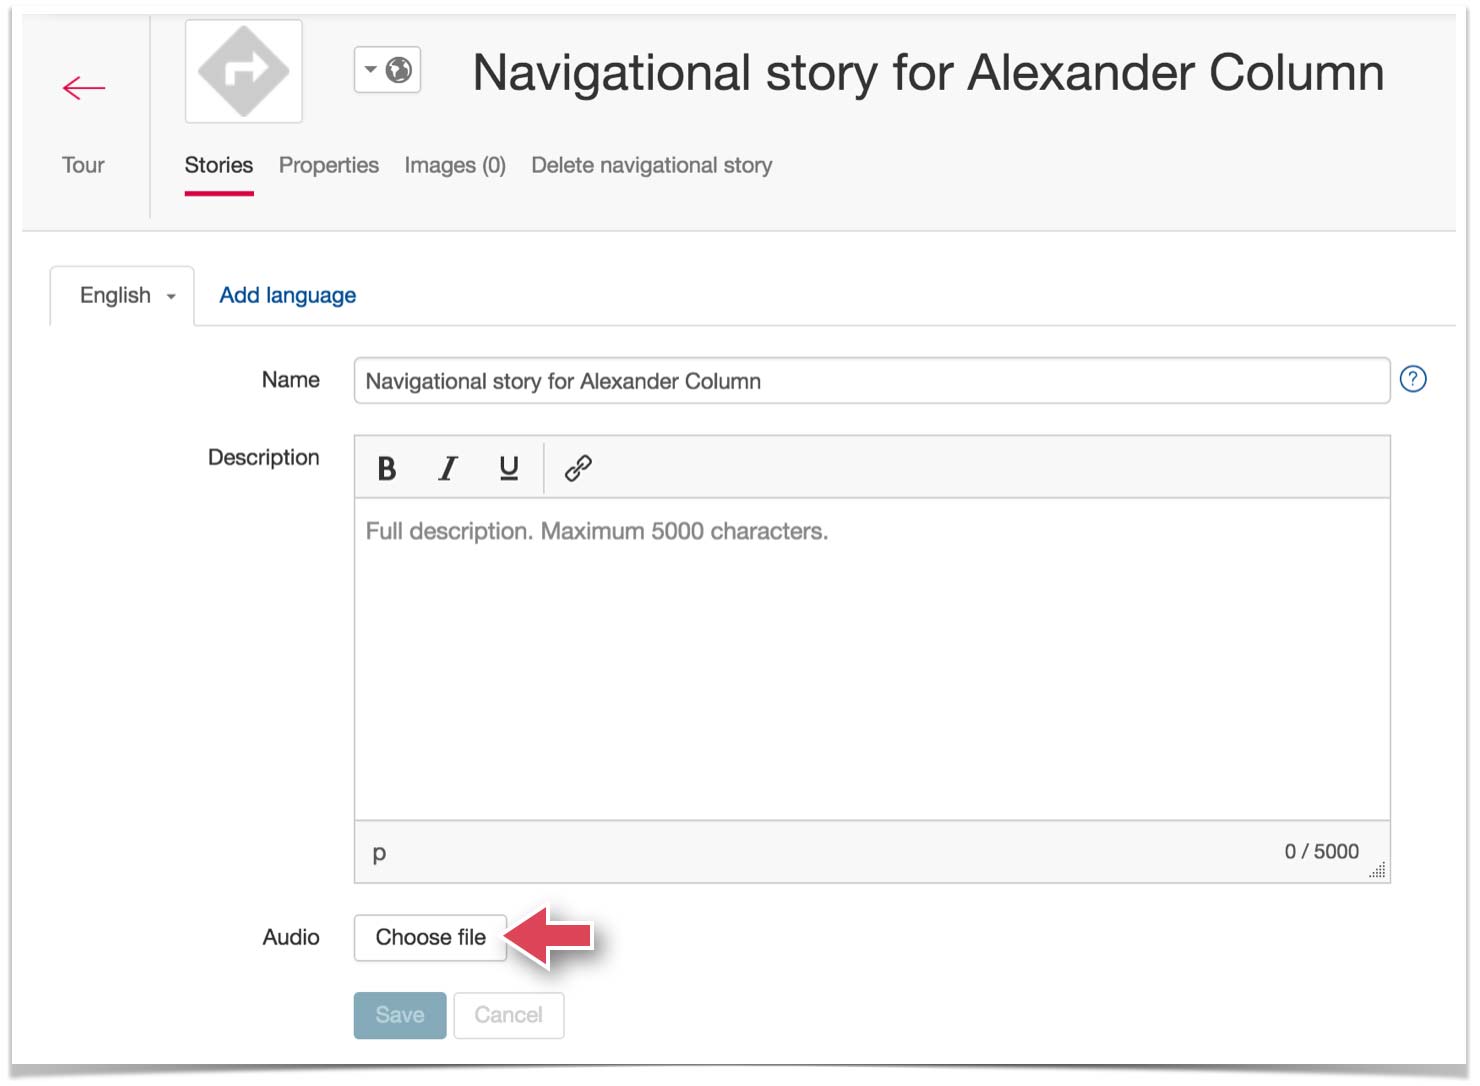
Open the properties window of the navigational story by clicking on its name (5).

Select the “Choose file” button (6) to load the previously prepared file with the audio prompts.

This completes your creation of a navigational story. There is no need to add a text with images, since the user of the mobile app won’t see them. Once he enters the trigger zone of the navigational story, he will hear audio only.
Now you know what navigational stories are and how to use them. We recommend that you also take a look at the video about working with trigger zones and also the brief article with tips for creating them.